Developing anything on top of WordPress can be a bit tricky, especially if you don't know where to start. Whether it be building an actual website using the CMS platform, or developing plugins and themes for it, it's almost always needed for you to have a local instance on your machine to test things out.
The Old-Fashioned Way
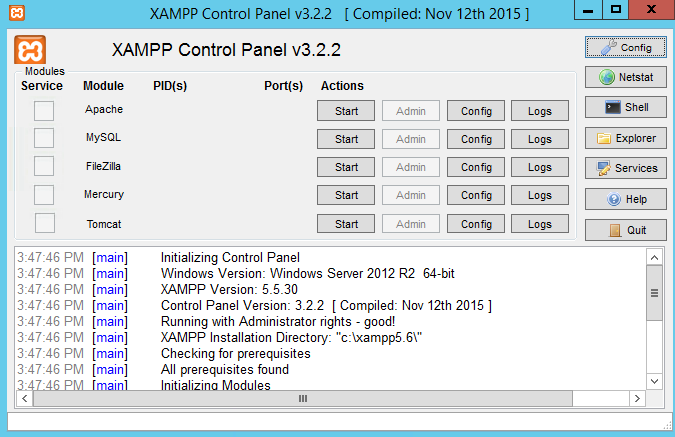
Back in the days when you can just spin up a web server using XAMPP, I can just download a copy of WordPress, put it in the default root directory of my local Apache instance, setup the database and configure WordPress to connect, then I should be good to go. For most occasions, this would suffice. However, due to the nature of WordPress as a very robust, flexible, and dynamic content management system, having particularly the ability to extend it using plugins, complexities arise when you have different plugins that may or may not be compatible with each other or the WordPress version you have installed. Then there's the issue of working on a specific project together with other members of a team, having different machines and your own configurations.
Containers

Then came containerization.
While I can probably explain it in my own words, it's probably best to focus on my next topic, so here's a Yoast blog I followed when I started using Docker to create WordPress instances on my local machine about a year ago.
The primary idea is to compose your development environment – primarily your web server which would house your WordPress application, and its database – using containers. You can think of containers as "packaged environments" that can run the same way on any operating system. This way, it doesn't matter if you personally have multiple different development machines, or multiple team members using different machines collaborating on your work. You can simply configure what your environments should be for different scenarios, and just share the same configuration between said machines, then just spin up the same environment for everyone. It also has an added bonus that you can now spin up multiple environments on the same machine, say for different WordPress versions that you need to test.
Automate all the way
A little backstory of how I was introduced into Warden.
About 3 years ago, I was tasked to develop extensions for Magento, a popular e-commerce platform now owned by Adobe. Unlike WordPress, Magento is an e-commerce-first platform. Of course, I needed to have a local instance on my machine to test things, but I was having a hard time to manually set one up because of the ridiculous and tedious process. Although admittedly it was my fault for not knowing how to configure ElasticSearch not to eat up all my RAM, it took me 2 weeks just to get a local instance running – only to find out that it's way too slow for me to develop things. Stackoverflow didn't help, so I had to go as far as posting in Reddit. Luckily, I managed to get answers and one of them is Warden. A few months after finishing the Magento extension, I had to setup another local instance of WordPress on a new machine and instead of following the Yoast blog above, I tried to use Warden. However, there really wasn't much of an official tutorial on how to use it for WordPress, not even in the official documentation, so here we are.
Warden is like XAMPP but on steroids as it leverages containerization technology.
It's basically an automation tool to configure different platform environments using containers for the platform's components. For example, the latest Magento requires more than just a web server and database but also ElasticSearch for searching, Varnish as a reverse proxy, and RabbitMQ for queueing – among others. With Warden, all you need to do is create a directory for your Magento instance, run a command to create the configuration file for your Magento environment, then execute a command to build the environment. What Warden does is create containers for each of the services mentioned above, and tie them all together so they all know how to talk to each other within your container's network.
The idea is pretty much the same for setting up WordPress.
Step 1: Create a directory for your WordPress instance
$ mkdir -p /path/to/your/wordpress-instancePretty much self-explanatory.
Step 2: Initialize your WordPress instance directory
Assuming you've already installed Warden and ran it for the first time without any hitch, you can directly go to your WordPress directory and execute the following:
$ warden env-init my_wordpress_instance wordpresswhere my_wordpress_instance is an identifier for your WordPress instance. No spaces, preferably snake-cased. This will create a .env file in the current working directory with default configurations for a WordPress instance.
Step 3: Download WordPress into the WordPress instance directory
You can just execute the following commands within the WP instance directory:
$ curl -O https://wordpress.org/latest.zip
$ unzip latest.zip
$ mv wordpress/* .
$ rm -r wordpress/ latest.zip
This should download the latest version of WordPress in a zipped file to your current working directory, unzip it, move the contents to the current working directory, and remove downloaded files and unnecessary folders.
Step 4: Run the WordPress environment on Warden
Just execute the following:
$ warden env upThis should set up all necessary containers, from web server to database, tie them all up as configured in your .env file.
Ideally, on first run, WordPress will let you configure the connection strings during set up, so just copy the values within the .env file and you'll be good to go.
As cherry on top, Warden does not just automate the container setup for you with the containers you need for your platform environment. It also provides several services out of the box to make your development way easier.
- Traefik - handles all the networking needed within your Warden services so all containers can talk to each other
- DNSMasq - handles DNS and DHCP locally, which is particularly useful in conjunction with ngrok to route requests; no more localhost:port, use your environment name instead
- Portainer - handle container management; pretty useful even without using Warden in general to manage other containers for development using its GUI
- Mailhog - is an email testing tool which you can configure with your environment if you want to test mailing functionality of your platform (ex. order confirmation and invoice sending for e-commerce functionalities)
For any developers out there who wants to take their WordPress development to the next level, Warden is definitely something worth trying.
WordPress + Warden
Setting up a local WordPress instance with Warden